Wednesday, August 29, 2012

Woo hoo!


Out of the boat shop and into the meadow!

Kent came with his tractor... Judith and Patrick arrived with a come-along... John came to man the winch... Stewart rushed home for lag bolts... Trevor provided a plan (developed with Robbie), the lumber, and a half-gallon jug of dish soap... Pam poured the tea... Patsy wrangled the wheelchairs... Naomi provided the chips and salsa, plus many of the shorter spectators...

... and the first hull moved out of the shop, and into the meadow. Woo hoo!
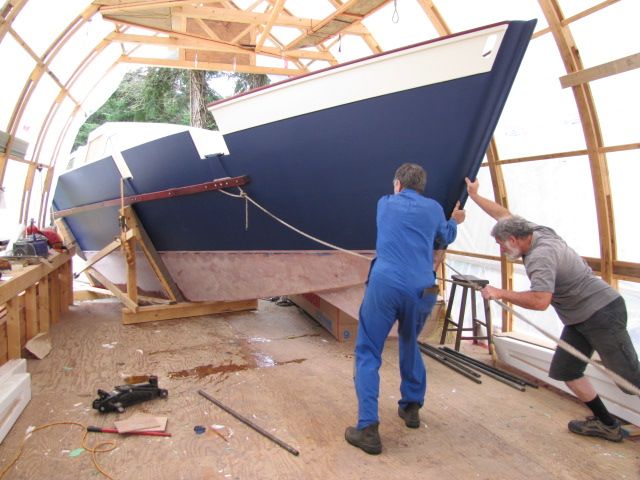
First it emerged from the boat shop... Robbie and Trevor pulled it with a come-along attached to the reinforced cradle. I call this picture, "Hatching."


Here's Robbie, contemplating the task with the come-along chain attached.
And the crowd gathered...


The plot thickens as a new character enters... Kent and his tractor!


The hull was hooked up and moved into the meadow in less than 90 minutes. This would perhaps seem less miraculous if you didn't know there was a 2.5 foot drop off the end of the shop to the driveway!


First it was hooked to the tractor...


... and pushed into position in the shop...

And slide down the ramp... yikes! ... 

... and eventually pulled into the meadow...
... with Kent at the helm.
Now the hull is in the meadow...

And the shop is empty. Note the bulkheads and backbone hanging from the rafters?  We call that "foreshadowing."


Tuesday, August 28, 2012

Installing the windows

Once the windows are in (and yes, I know they are called lights in nautical circles, but our plans say windows), the boat really looks like a boat. 

In the original Narai Mk IV plans, Wharram calls for acrylic windows, with an external frame. We decided early on that we preferred auto glass to acrylic. All three of us have seen yellowed and crazed acrylic windows, and dislike the thought of future replacement. We got the glass cut to templates by Budget Auto Glass in Nanaimo.

We discovered Scott B. William's extremely clear and detailed instructions for a different installation approach on his Tiki 26 blog -- Element II. (Thanks, Scott!) Trevor and Robbie made a few modifications to the approach as they worked through it, since acrylic and glass don't quite work the same way, but the basic idea was Scott's. Like Scott, our crew began by installing plywood frames in the cabin interior, around each window. 

Glass windows don't come with paper backing, so Robbie covered the inside and outside of each piece of glass with masking tape. At the time, we were thinking that wooden blocks would be glued onto the tape to hold the window in position. With the first test fit, it became apparent that this wouldn't work with a glass window. Masking tape doesn't bond especially well to glass. In general, this is a Good Thing -- but not when you're trying to install windows with this method. When the window was pressed into its recess, the tape pulled away from the glass, allowing the blocks to move. Moving blocks do not equal blocks that will hold the glass in a particular position. Back to the drawing board!

Robbie and Trevor decided to try 1/8"-thick rubber cut into 1/4" squares to hold the glass in position. "In position" means "flush to the outside surface of the cabin." We had decided to use a 1/8" bed of sealant. Something has to hold the window in position against the frame while the sealant -- Sikaflex -- sets. The rubber squares were the perfect thickness for this. Trevor attached these squares to the inner frames, using a blob of Sikaflex. (You'll notice that they taped around the outside of all the windows before they began all this.)

Why Sikaflex? Mostly because Trevor has more experience using it -- none of us were really familiar with the silicone-based sealant Scott used on Element II.  Sikaflex is used a lot on boats in our area, and it seems to hold up well. Here's hoping!

Once the blocks were in position, it was time to apply the Sikaflex. Trevor wielded 
the caulking gun. He applied a 1/8" layer of sealant all around the frame surface, and also to a one-inch perimeter to the mating glass surface.


It was a great day for manufacturers of masking tape.

And Sikaflex.

And us, since it only took one day to do all seven windows.

In the picture above, you can see two small grey things on the side deck, just below the masking tape. Sherlock Holmes himself might not be able to identify these items from a single photograph. They are small
lengths of clothesline -- the plastic kind with the metal core. They played a vital role in holding the glass in position. Trevor glued (Sikaflexed?) them into position against the frame at the bottom, and they held the glass up just enough to allow for a bead of Sikaflex to fill the gap. They chose this material because it's easy to yank them out again once the Sikaflex sets. At least that's the hope. 

 Once the Sikaflex was applied, and the clothesline placeholders in position, it was time to put in the glass. Trevor pressed the glass in from the outside. Robbie was in the cabin, watching to make sure there was squeeze-out and then cleaning it up. It was really handy to have both surfaces covered with masking tape -- made cleanup easier.

We found there was enough squeeze-out front and back to make additional application of sealant unnecessary. The little rubber squares we used instead of wooden blocks just stay in the frame -- they are completely embedded in the Sikaflex. The advantage of this is that we could finish inside and outside surfaces at the same time. We will need to fill the holes left when the bits of clothesline are removed.
First the taped window is pressed in place.

Then the extra sealant is cleaned up inside...

... and out.


We think they look terrific. And they'll look even better without the bits of clothesline sticking out.


Saturday, August 4, 2012

Replacing the boat shop tarp, or, UV is Not Your Friend

The tarp on the boat shop started looking a little the worse for wear earlier this summer. There was at least a couple of small rips visible from the ground, up near the ridgepole.


One fine morning, we walked out to the boat shop to find the tarp on the ground on one side -- a huge split had opened up and down it came. Repairs were contemplated. Duct tape was priced. A new tarp was purchased. 


Tarp 2.0 is white, and not quite as big as the old grey one. It's laced to a row of nails along the bottom of the shop. Tarp 1.0 was laced on one side, but rolled around a 2x4 and nailed to the base of the shop on the other side. Smaller in this case seems better.
Without the tarp, you can see the boat (nice!) and the stuff against the wall of the shop (less!)
 -- but mostly, it's just way too hot to work inside when it's sunny.Trevor and Russ survey the task.

Robbie tied cord to the tarp, threw the ball of cord over the shop then cut the pulling ropes to length.
(Good arm!  Jays take note!) No photo of actual pulling of tarp available, since the photographer
had a rope to pull too. A certain amount of straightening and tugging had to happen up top too -- lots of friction.


And here it is, in place and lashed on.

Other things have been happening, too -- mostly interior painting and sanding. Not as many updates recently since the painting process isn't all that exciting when you're doing five coats (three primer and two topcoat on interior surfaces.) It would be an ongoing sequence of, "Look, here it is, white!" followed by, "Look, here it is, even whiter!" We'll update when it reaches ultimate whiteness. (Or in this case, ultimate Hatteras Offwhiteness.)